dash ice cream maker instructions
The Dash Ice Cream Maker offers a range of models, from My Pint to Everyday, designed for effortless homemade ice cream creation, perfect for customizable treats.
Overview of the Dash Ice Cream Maker Models
Dash offers a variety of ice cream maker models, each designed to cater to different needs and preferences. The My Pint Ice Cream Maker is ideal for single servings, producing 1.6 cups of fresh ice cream in under 30 minutes. The Dash Everyday DIC700AQ is a compact and sleek option, perfect for home use, while the Dash Deluxe Ice Cream Maker boasts a larger capacity, churning up to 1 quart of frozen treats. These models feature user-friendly designs, with components like freezing bowls, churns, and easy-to-use controls. Whether you prefer electric or manual operation, Dash provides versatile solutions for crafting customizable ice cream, gelato, or sorbet at home. Each model ensures quick and delicious results, making them a great addition to any kitchen.
Key Features and Benefits of the Dash Ice Cream Maker
The Dash Ice Cream Maker stands out for its compact and sleek design, making it a space-saving addition to any kitchen. It features a freezing bowl that eliminates the need for pre-mix freezing, allowing for quick and convenient use. The machine offers multiple operating modes, including electric and manual options, providing flexibility for users. With a user-friendly interface, it’s easy to operate and clean. The Dash models also come with accessories like mixing spoons and recipe books, enhancing the overall experience. Its ability to churn ice cream in under 30 minutes and handle various mixtures ensures a wide range of customization. These features make the Dash Ice Cream Maker a practical and efficient tool for creating delicious homemade frozen treats. Its durability and easy maintenance further add to its appeal, making it a worthwhile investment for ice cream enthusiasts. Additionally, the machine’s portability allows for easy storage and transport. Overall, the Dash Ice Cream Maker combines functionality, convenience, and versatility, catering to both casual users and those who love experimenting with new recipes. It’s designed to deliver consistent results, ensuring that every batch of ice cream is smooth and creamy.

Preparation and Setup
Begin by freezing the Dash Ice Cream Maker’s bowl for 24-48 hours. Chill ingredients for 2 hours before use to ensure optimal consistency and flavor.
Unboxing and Initial Cleaning
When you unbox your Dash Ice Cream Maker, carefully inspect the appliance and its components for any damage. Gently wash the mixing bowl, churn, and lid with mild soap and warm water. Rinse thoroughly and dry with a clean towel to prevent water spots. Before first use, ensure all parts are completely dry to avoid any residual moisture affecting performance. Once cleaned, place the bowl in the freezer to chill as per the manufacturer’s instructions. Reading the manual beforehand is highly recommended to familiarize yourself with the parts and their functions. Proper cleaning and preparation ensure your ice cream maker is ready for its first use, delivering the best results for your homemade treats.
Freezing the Bowl: Essential Steps
To prepare your Dash Ice Cream Maker, the bowl must be frozen beforehand. Place the mixing bowl in the freezer for 24-48 hours to ensure it reaches the optimal temperature. Avoid opening the freezer during this time to maintain consistent cooling. Once frozen, remove the bowl from the freezer and immediately attach it to the machine base. Ensure the bowl is securely locked into position to prevent any movement during churning. It’s important not to skip this step, as a properly frozen bowl is crucial for producing smooth and creamy ice cream. Properly freezing the bowl guarantees efficient churning and the best texture for your homemade ice cream.
Chilling Ingredients: Best Practices
Chilling your ingredients is a critical step before using the Dash Ice Cream Maker. Place your mixture in the refrigerator for at least 2 hours to ensure all components are well-chilled. This step helps prevent ice crystals from forming and ensures a smoother texture in your final product. For dairy-based recipes, chill the cream, milk, and flavorings thoroughly. For non-dairy options, refrigerate plant-based milks and sweeteners. Keeping ingredients cold also aids in faster churning and better aeration. Avoid adding room-temperature ingredients, as this can hinder the machine’s performance. Proper chilling ensures your ice cream turns out creamy and evenly textured, making it a key preparatory step for success.

Using the Dash Ice Cream Maker
The Dash Ice Cream Maker offers Electric Mode for quick, effortless churning and Manual Mode for precise control, allowing you to tailor the process to your preference and achieve the perfect texture every time with ease and efficiency.
Adding Ingredients: Measurement and Ratios
When using the Dash Ice Cream Maker, precise ingredient measurement is crucial for optimal results. For the My Pint model, the liquid mixture should not exceed 1 cup. A common ratio is 2 cups of heavy cream to 1 cup of milk, with 1 tablespoon of flavorings like vanilla. Sugar or sweeteners should be added based on taste, typically 1/4 to 1/2 cup. For fruit-based recipes, 1;5 cups of pureed fruit mixed with 1/2 cup of cream is ideal. Ensure all ingredients are chilled before adding. Pour the mixture into the pre-frozen bowl and start churning. For mix-ins like nuts or chocolate chips, add them during the last 2 minutes of churning. Avoid overfilling to ensure smooth, even churning and the perfect scoopable texture.
Operating Modes: Electric vs. Manual
The Dash Ice Cream Maker offers two operating modes: Electric and Manual. The Electric Mode is the most convenient, allowing you to churn ingredients automatically with the press of a button. For the My Pint model, this mode typically takes 15-30 minutes to produce fresh ice cream. The Manual Mode, while less common, provides more control over the churning process but requires constant effort. For optimal results, ensure the bowl is fully frozen before use. In Manual Mode, churn continuously for 20-25 minutes until the desired consistency is achieved. Both modes work best with pre-chilled ingredients for smoother, creamier results. Choose the mode that suits your preference for speed and effort.
Churning Process: Timings and Techniques
The Dash Ice Cream Maker’s churning process typically takes 15-30 minutes, depending on the model and ingredients. Electric mode automatically churns the mixture, while manual mode requires consistent effort. For best results, ensure the bowl is fully frozen and ingredients are chilled. Start with a smooth, even consistency by pouring the mixture through the food chute. If using mix-ins like nuts or fruit, add them during the last 2-3 minutes of churning. Avoid over-churning to prevent ice crystals. For manual mode, churn continuously until the desired texture is achieved, about 20-25 minutes. Monitor the process to ensure a creamy finish. Proper timing and technique are key to achieving smooth, professional-quality ice cream at home.

Care and Maintenance
Regularly clean the Dash Ice Cream Maker with mild soap and dry thoroughly to prevent rust. Store in a cool, dry place to maintain performance and longevity.
Cleaning the Machine: Step-by-Step Guide
To clean the Dash Ice Cream Maker, start by unplugging it and disassembling all removable parts. Wash the bowl, lid, and churn blade with mild soap and warm water. Avoid abrasive cleaners to prevent damage. Rinse thoroughly and dry with a soft cloth to prevent water spots. For tough residue, soak parts in warm soapy water for 10-15 minutes before scrubbing gently. Sanitize by wiping with a mixture of equal parts water and white vinegar. Allow all components to air dry completely before storing. Regular cleaning ensures optimal performance and prevents bacterial growth. Always refer to the manual for specific cleaning instructions for your model.
Storage Tips for Longevity
Proper storage is essential to maintain the Dash Ice Cream Maker’s performance and longevity. After cleaning, store the machine in a cool, dry place away from direct sunlight. Avoid stacking heavy objects on top to prevent damage. The freezing bowl should be stored separately in the freezer if not in use for an extended period. Keep the power cord neatly wrapped to avoid tangling. For models with additional accessories, store them in a protective bag or container to prevent scratches. Regularly check stored parts for any signs of moisture or damage and ensure all components are completely dry before storing. Proper storage ensures the machine remains in excellent condition for future use.

Tips for Perfect Ice Cream
Use fresh, high-quality ingredients and precise measurements for optimal flavor and texture. Ensure ingredients are chilled and avoid over-churning to achieve creamy, smooth results every time.
Avoiding Common Mistakes
Avoid overloading the machine with too much liquid mixture, as this can disrupt the churning process. Ensure the bowl is fully frozen before use, and ingredients are properly chilled. Over-churning can result in overly dense or icy textures, so monitor the consistency closely. Never add hard or large mix-ins during the initial churning, as they may damage the machine. Instead, fold them in toward the end. Avoid using low-fat ingredients, as they can lead to a less creamy texture. Always follow the recommended ratios of liquid to solids to achieve the best results. Finally, refrain from opening the lid too frequently, as this can introduce air and disrupt the churning process. By avoiding these mistakes, you’ll achieve smooth, professional-quality ice cream every time.
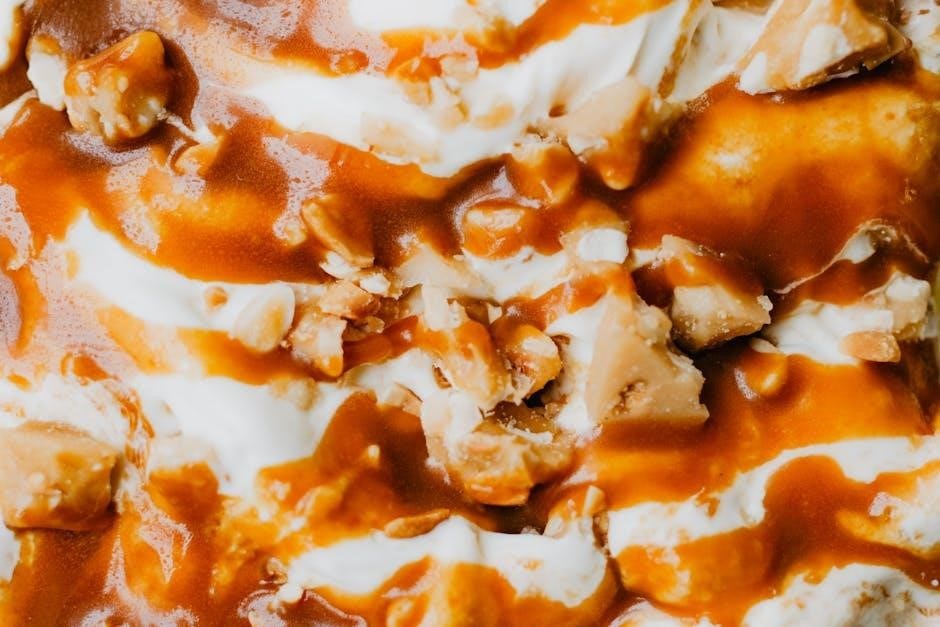
Enhancing Flavor and Texture
For richer, creamier results, use high-quality, fresh ingredients like heavy cream, whole milk, and real vanilla. Experiment with unique flavors by incorporating mix-ins such as fresh fruits, nuts, or cocoa powder. Add-ins like chocolate chips or caramel should be folded in during the last few minutes of churning to maintain texture. To enhance sweetness without overpowering, use natural sweeteners like honey or maple syrup sparingly. For a lighter texture, incorporate a touch of salt or a splash of liqueur. Properly chilling ingredients ensures a smoother churn, while avoiding overloading prevents ice crystals. Don’t over-process, as this can lead to a dense texture. Balancing flavors and techniques will elevate your homemade ice cream to professional quality, making every batch a delightful treat.
With the Dash Ice Cream Maker, creating delicious, customizable ice cream at home is simpler than ever. By following the instructions and tips outlined, users can craft unique flavors tailored to their preferences. The machine’s ease of use, quick churn times, and compact design make it a versatile addition to any kitchen. Whether you’re making single servings with the My Pint or larger batches with the Everyday model, the Dash Ice Cream Maker empowers you to explore endless possibilities. Remember to experiment with ingredients, maintain proper setup, and enjoy the satisfaction of homemade treats. Happy churning and savor the joy of creating your perfect scoop!